Labels

Friday, August 8, 2014

Aloo wadi

Aloo wadi


Aloo wadi is a snack made up of Colocasia leaves, which are stuffed, rolled and is a popular cusine in Maharashtra and Gujarat.  Colocasia leaves are commonly also known as Taro leaves. In Hindi they are called “Arbi ke patte, in Marathi “Aloochi paan”. These leaves are mostly available during monsoon (especially Shravan Mass) in India.

While making Aloo wadi selecting the leaves is very important step. There are 2 types and can be easily recognized by their stem color. The green colored stem ones are used to make sabji and the black stems ones are used to make Aloo wadi. These leaves are little bit itchy, which is due to presence of Oxalic acid crystals, which can be easily corrected by adding sour things while cooking it.

Taro leaves are a rich source of Vitamin A, B6, C, Phosphorus, Protein, Thiamine, Riboflavin, Niacin, Folate, Calcium, Iron, Magnesiun, Potassium, Copper, Mangnesium and are good source of dietary fiber too.


These rolls can be made a day before and then tempered or shallow fried. They can be served plain or with green chutney or as a side dish with steamed rice and curry. They are also a nice teatime snacks during monsoon season.

Ingredients:
6 – 7 Taro leaves
1 ½ cup Besan (chickpea flour)
2 tblspn Red chilly powder
1 tblspn Garam Masala powder
1tspn Turmeric powder
Pinch of Hing (Asafoetida)
1tspn Corriander powder
1 big lemon size ball of tamarind pulp
½ cup Jaggery
½ cup thick Coconut milk
Salt to taste
Oil for shallow frying
1tblspn Seasme seeds (Optional)

Method:
    1.    Soak the tamarind with jaggery in hot water for half an hour.


    2.    Cut the stalks and veins from the backside of the leaf, this makes them easier to roll. Now wash and pat dry the leaves.


    3.    In a medium sized bowl take besan, red chilly powder, Garam masala powder, coriander and turmeric powder with a pinch of hing and slat to taste. Mix it well.

    4.    Now add 1/4th of the tamrind- jaggery pulp water and mix it well. Add the coconut milk to make a thick paste. You can add a tblspn of Seasme seeds for nutty flavor (Optional).

   5.    To start making the rolls use the leaves size wise, using the larger leaf first. Ensure that the dark side of the leaf is kept at the bottom. Sprinkle some tamarind- jaggery water on the leaf then apply the besan paste evenly all over the leaf. Now take another leaf and place the leaf tip in opposite direction. Placing the leaves in the opposite direction helps to roll them easily.  Sprinkle it again with tamarind-jaggery water and apply the besan paste. Repeat the process for all the three leaves.


   6.    Now fold the leaves from both the sides and apply the besan paste. Start rolling the leaves tightly. I have made two rolls of  6 Taro leaves, taking three leaves in each roll.


   7.    Place the rolls in the steamer and steam them for 15- 20 mintues.  After steaming allow them to cool at room temperature.


   8.    Cut the rolls into ½” inch thickness and shallow fry them till golden in color. Garnish it with sesame seeds, freshly grated coconut and  fresh coriander leaves.


NOTE:
  •      Avoid using more than 3 – 4 leaves in a roll, as it will make difficult to roll the leaves.
  •           These rolls are ready to eat after steaming. But I like mine shallow fried, as I have grown up eating it in that way. As shallow fried ones are nice and crunchy to taste.
  •     Always remember to use the leaves as per the size. Starting with the biggest first.
  •     Extra rolls can be stored in the refrigerator they remain fresh for as long as 2 months if packed tightly in an air tight container lined with silver foil.

Sunday, July 20, 2014

Unnakaya / Banana Rolls

Unnakaya / Banana Rolls


Unnakaya is a spindle shaped sweet dessert or a snack made up of plantains. It’s a delicacy from Malabar region of Kerala served during weddings, Iftar and other occasion.

The very first time I got to eat this from a friend on an Iftar day and I fall in love with it.  It’s a yummmmmy dessert.  I asked for the recipe from her and was surprised to know that we can do wonders with this plantain. My husband is from Kerala but even he never had it.

This particular recipe is rarely available in shops or in restaurants. For this recipe we need the plantains, which are just about to get ripe. If they are fully ripe then stuffing and making them in shape becomes impossible.

So lets proceed with the recipe.

Ingredients:
4 just about to ripe Plantains / Ethapazham
1 ½ cup Desiccated fresh Coconut
Few raisins and broken pieces of cashewnuts
½ tspn Cardamom powder
1/4th cup grated jaggery (adjust as per your sweet tooth)
Oil for deep-frying

Method:
    1.    Wash the plantains and steam them for 20-25 minutes. Poke the fork in it to see if they are soft if not steam them further more for 10-15 minutes.


    2.    Let them cool, then peel the skin and mash the plantains or grind the plantains in the mixer without using water till we get the soft smooth dough. Keep it aside.

    3.    In a medium sized bowl mix desiccated coconut, raisin, broken pieces of cashewnuts, jaggery and cardamom powder. Mix them nicely till all are blended very well.


    4.    Grease your hands with oil, take lemon size plantain dough and flatten it in your palm.


    5.    Put a spoonful of coconut mixture in the centre of the flatten dough and fold your hands to seal the edges and to give it a spindle shape.


   6.    Though you can make them in any shape you like.

   7.    Repeat the same with rest of the plantain dough.


   8.    Heat the oil for deep-frying and put one by one banana rolls and fry them till they are golden brown in color. Keep them on the kitchen paper towel to remove excess oil.


   9.    Serve them at teatime, Iftar or any occasion.


NOTE:
  • For Unnakaya choosing the plantain is very important as they should not be very much ripe nor raw. They should be just ripe.
  •  If they are over ripen don’t try to make Unnakaya, as you will never get the shape of it.
  • Sometimes the plantains might not become soft, in that case just steam them for another 10-15 minutes.
  •  The plantain dough consistency should be like of a mashed potato.
  • For mashing the plantains you can also grind them but don’t add water while grinding, else the binding will break and wont hold the shape.
  • For coconut mixture there are many variations some like to add eggs to it, and fry the coconut mixture. While some like to fry the coconut, raisins and cashew nuts in ghee.


Tuesday, July 15, 2014

Deep Fried Ice cream

Deep Fried Ice cream 


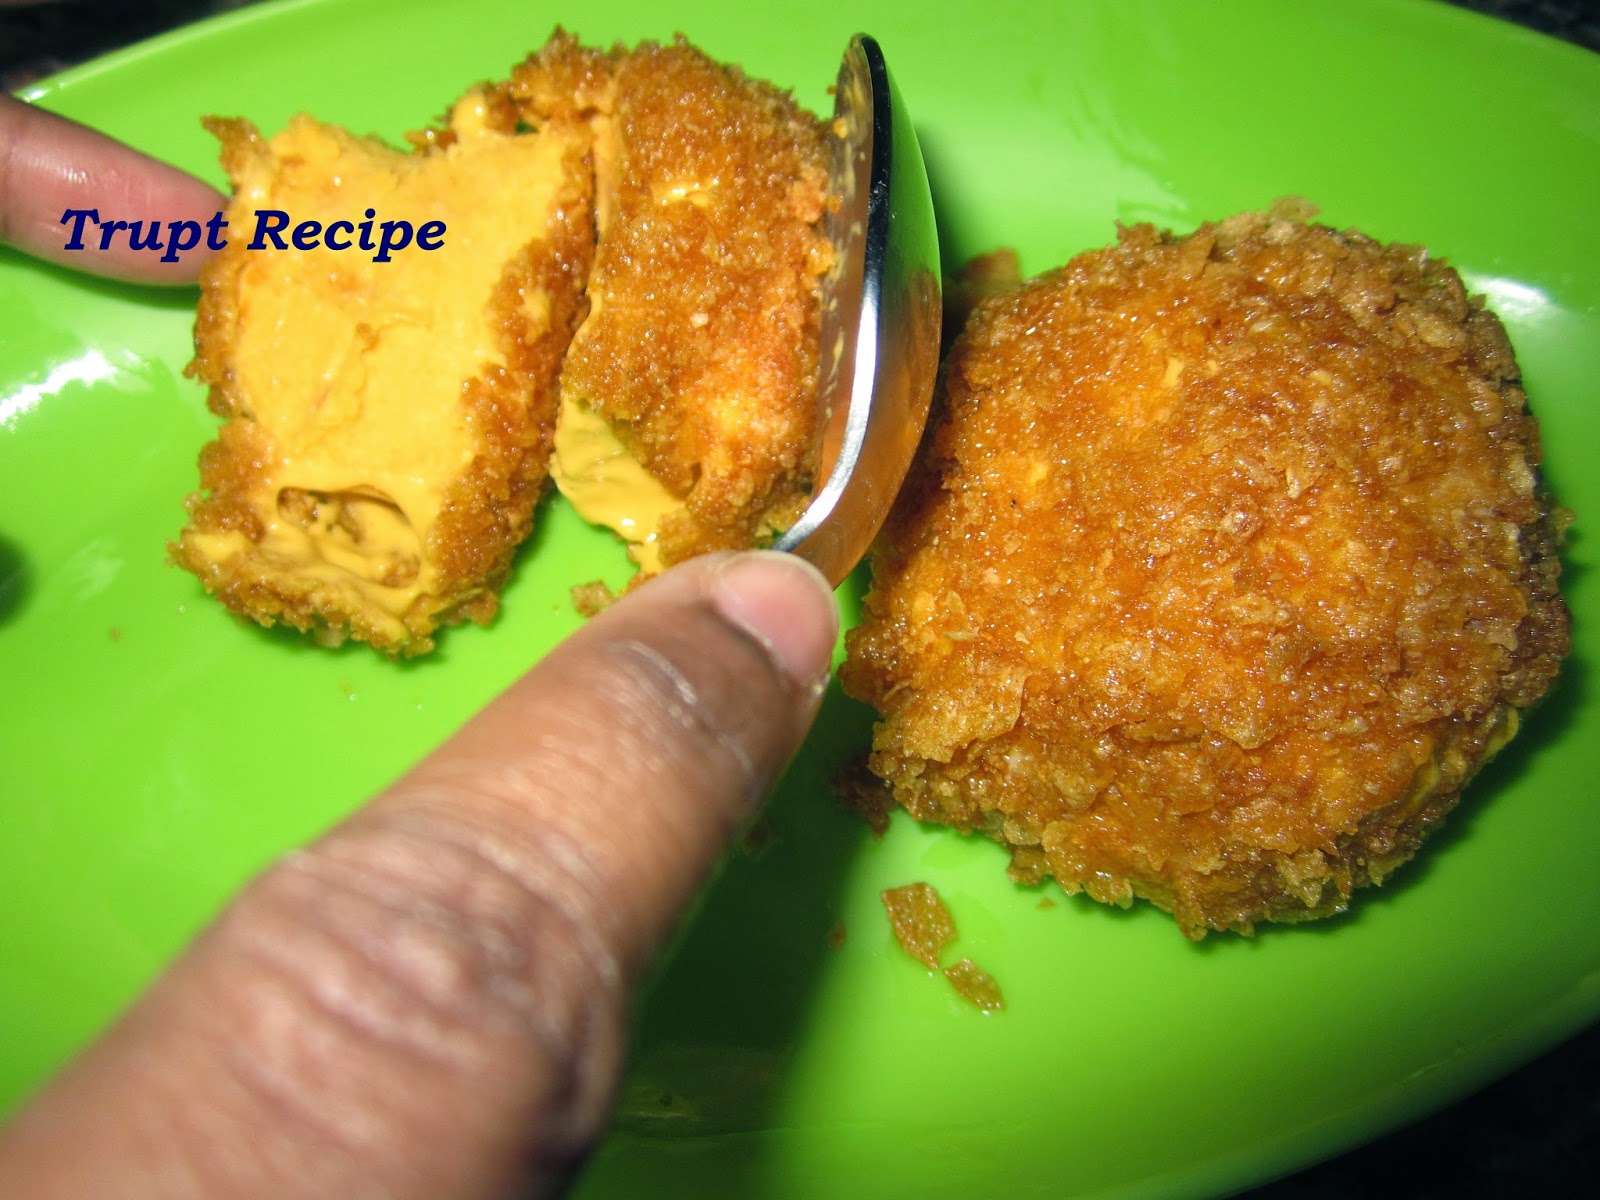
Yeah friends you are reading it correctly “Deep fried Ice cream” and I have not gone crazy. It’s a combination of hot and cold.

It’s actually a treat, which seems impossible by placing a frozen ice cream into boiling oil and still keeping the ice cream in perfect shape. The outcome of this project is truly delicious indulgence that is ideal for dessert, parties and alike.

Ingredients:
6 Scoops of Vanilla Ice cream or (any flavour of your choice)
1 ½ cup Cornflakes crushed
1 Egg
Vegetable oil for deep frying

Method:
   1.    Scoop ice cream and keep it on the tray that can go in the freezer. Keep the tray in the freezer till the ice cream scoops are hard to touch. Max for an hour or depending on freezers cooling system.


   2.    In a deep bowl take crushed cornflakes and in other deep bowl beat the egg.


   3.    Now take the scoops out of the freezer and roll them in the crushed cornflakes then in egg and then again in crushed cornflakes coating the ice cream properly with the cornflakes.


   4.    Place the scoops back in the freezer till they are completely frozen.

   5.    Heat the oil in a pan for deep frying until the oil reaches boiling point. Put the frozen ice cream scoops in the oil and just fry till it turns golden brown in color, which is about 30 sec to 1 min.  


   6.    Serve them immediately in the serving bowl and drizzle your favourite toppings.


NOTE:
  • Deep fry the ice cream scoops one at a time and serve them immediately or the ice cream will start melting.
  • When making for large group make sure that the scoops doesn’t melt hence remove them from the freezer one at a time.
  • Outer coating can be made more crunchier by adding coconut, walnut, digestive biscuits or cookie crumbs in cornflakes mixture.


Friday, June 6, 2014

MANGO ICE CREAM

MANGO ICE CREAM


Mangos are in the season and thought of sharing one more recipe of it, which we can have it with enjoyment and without any guilt. I’m really excited to share this recipe with you all as this ice cream is so creamy, soft and rich with flavours.

This homemade ice cream is much better than the store bought where they are flavoured with artificial colours, flavours and sweeteners and on the top its safe to give our children’s. That’s what I mean you can have this ice cream without any guilt as you know what’s there in it.

In this recipe I have added Kesar / Saffron and fresh mango bites but its optional you can skip them if you want. Similar ways you can prepare your own flavoured ice cream with different fruits too. Voila!!! What else we need now lets start straight with our recipe.

Ingredients:
250 ml heavy or double cream
200ml condensed milk
200ml thick and fresh mango pulp
1tblpsn fresh lemon juice
Few strands of Kesar/ Saffron (Optional)
½ Mango cut in small bites size bits (optional)

Method:
1. Chill the bowl that will be used to whip the cream in freezer along with heavy cream and    whisk attachments in the freezer for 10 – 15 minutes.

2. In the chilled bowl add the heavy cream, condensed milk and lemon juice and whip the mixture till you get stiff peaks. Don’t overbeat otherwise will get chilled butter instead of ice cream.


3. Now add the saffron strands, Mango pulp and mango bites in the cream and fold them gently but very well with the help of spatula to incorporate as much as air possible in the process. This process helps to makes the ice cream light and airy.


4. Pour the mixture in airtight container. While pouring the mixture create as much as folds as you can to trap even more air in the process.


5. Cover the container tightly and place it in the freezer for overnight to set.


6. Before serving the ice cream remove the ice cream container from the freezer and let it rest for few minutes at room temperature. This will help to easily scoop out the ice cream.

7. Our ice cream is ready. I like to serve my mango ice cream with honey drizzled on the top. Yummmmy!!!!!!!


NOTE:
  • Chilling of bowl, cream and whisk attachment is a very important step to whip the cream for any purpose. This helps the cream to whip at a greater volume making it nice airy and fluffy.
  • This ice cream stays up-to a week or more may be not sure coz mine always got over within a week. ;-)
  • Can use the same recipe to make your favourite flavoured ice creams. For Anjeer ice cream soak them overnight and grind them to a fine paste and use.
  • You can chop medium chunks of mangoes and serve with a dollop of mango ice cream on top. It tastes yummy believe me.

2   

Idiyappam

Idiyappam


Idiyappam is culinary specialty of Kerala, Tamil Nadu, southern areas of Karnataka but also seen in Sri Lanka. The name ‘’Idiyappam’’ derives from the words idi meaning ‘broken down’, and appam meaning ‘pancake’. This dish is also called in different names in different states or countries like- Noolappam, noolputtu, semige, sevaiya. The word nool means String or thread.

Idiyappam is made with minimal ingredients its quick and easy to make and can be served at breakfast or along with main course. It can be served with jaggery and coconut milk, alone with sugar for kids, but best accomplished with chicken curry, fish curry, egg curry, vegetable stew/ curry or kadla curry (black chana curry).

Lets get introduced first and foremost to Idiyappam maker, which is the most important part of the recipe. The most commonly used or available in the market these days is the below one with different types of disc patterns which you can change the disc depending on what you are making. So for our idiyappam recipe we need the disc with very fine holes.         


Now lets get started with the recipe.

Ingredients:
1 cup Rice flour
1 ½ cup water
Salt as per the taste
1 tblpsn Oil/ghee (I have used ghee)
¼ cup freshly grated coconut (optional)

**Use the same cup measurement for rice flour and water.

Method:
      1. Take a wide pan add water, ghee/ oil, and salt as per taste and let the water simmer on high or until you see the bubbles started appearing at the bottom of the pan.


      2. Put off the flame and add the rice flour to the simmering water, stir it with a wooden spatula to form sticky soft dough. You can keep the dough aside for sometime.


      3. When the dough is still warm knead the dough well with your hands to form nice and very soft dough.


      4. Place the fine holes disc in the idiyappam maker. Take a portion of the dough, make it into a cylindrical shape and place it in idiyappam press. Close the lid of press.


      5. Grease the idly trays with little oil or if using coconut sprinkle freshly grated coconut on the idly moulds. Turn the handle of the idiyappam in clockwise direction and let the noodles swirl on idli moulds in circular pattern don’t make mount of noodles just make 2 – 3 circular rounds of noodles.


     6. Steam them for 12 – 15mintues. Then remove from steamer and let it cool down for few minutes before spooning out in the plate.


      7. While still hot serve them with your favorite curry. I have served it kadla curry.


NOTE:

  • Sometimes depending upon the quality of the rice flour it soaks the water, you can always keep little more hot water ready and rice flour if required.
  • Don’t use boiling water it will cook the rice flour and make it hard to press; water just needs to be very hot.
  • If making idiyappams in bulk make sure you keep the dough covered with wet cloth. Best idiyappams are when the dough is still slightly hot. Or else make the dough in batches.
  • You can also sprinkle grated coconut on top of noodles to prevent the upper tray sticking them.
  •  If fresh banana leafs are available cut them in small rounds and press the idiyappams over it and steam, it gives a nice aroma and flavor to idiyappam.